Showing posts with label add. Show all posts
Showing posts with label add. Show all posts
Saturday, March 4, 2017
Add Animated Flying Twitter Bird Widget to Blogger
Add Animated Flying Twitter Bird Widget to Blogger

I hope you will like my these articles, also will like this article Add Animated Flying Twitter Bird Widget to Blogger.
Now Lets Start to Add Flying Bird to Blogger.
1. Log in to Blogger Account.
2. Go to Dashboard > Template > Edit HTML
3. Copy The Below Widget Code.
<!-- Twitter Bird Widget for Blogger by RexHacker.blogspot.com -->
<script type="text/javascript" src="http://yourjavascript.com/71110244313/suyb-twitter-bird.js">
</script>
<script type="text/javascript">
var twitterAccount = "Rexhacker";
var tweetThisText = " <data:blog.pageTitle/> : <data:blog.url/> ";
tripleflapInit();
</script>
<span style="font-size:11px;position:absolute;"><a title=Blogger Widget by http://Rexhacker.blogspot.com href="http://rexhacker.blogspot.com" target=_blank>Blogger Widgets</a></span>
<!-- Twitter Bird Widget for Blogger by rexhacker.blogspot.com -->
Note: You Can Copy This Code From This Link.
4. Search For </body> Tag And Place Widget Code Just Before It.5. Change Your Twitter Account User Name.
6. Save Your Template.
7. You Are Done. Thanks.
Available link for download
Add Live Chat widget to Blogger
Add Live Chat widget to Blogger

i hope you will like my this widget also like my old widget sharing. Before i have share Add Animated Flying Twitter Bird Widget to Blogger and a lot of people like and appreciate and before this tutorial i have share one more great widget for my friends that is Add Cool Jquery Popup Facebook Like Box to Blogger.
Dont risk the success of your live events. Trust Chatroll to help you reach more people, engage audiences and grow your market.
Friends now we will start to how to Add Live Chat Widget to Blogger.
Part 1: Getting Live chat Widget Code
1. Open Chatroll website and Click on Signup For Free button.
2. At next screen create your new account or login with your facebook account. In my case I use Facebook login Method.
3. Once you logged in your account then Click on Create a New Live Event option.
4. Next page will be your live widget settings page. Enter Name for your widget and click Continue option.
5. Next screen is about platform selection screen. Select Blogger option.
6. Code for your live chat widget will appear. Copy this code and click Continue option.
7. Now Click on Go to Settings Now option.
8. Now a final page will appear which contains your live chat widget settings like color scheme of your widget. Configure your widget here and save the settings by clicking on Save Settings option.
Part 2: Adding Live Chat Widget to Blogger
1. Log in to your blogger account > Dashboard and select your blog.
2. Select Layout Option and Click on Add a Gadget option.
3. Select HTML/JavaScript widget.
4. In the HTML/JavaScript widget paste the code of the live chat widget which is obtained in the Step 6 in Part 1 of the tutorial.
5. Save the widget and you are Done.
Available link for download
Monday, February 27, 2017
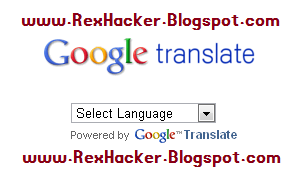
Add Google Translate Gadget to Blogger
Add Google Translate Gadget to Blogger

with the help of this gadget you can easily translate your blog/website into any language. I hope you will enjoy this tutorial and will be must appreciate me.
Its very nice and easy.
You can check my previous post Add Flying Letters Below Mouse Pointer Animation and before this i have shared one more interesting thing that is Add Circle Image Style to Popular Post In Blogger.
Now we will start this tutorial. If you have any problem about this tutorial you can Contact Us, we will try to explain it more.
1. Sign In to your blogger account and click on "Pages"
2. Click "Add Gadget " and select "HTML/JavaScript".
3. Copy this below code and Save it.
<script src="http://www.gmodules.com/ig/ifr?url=http://www.google.com/ig/modules/translatemypage.xml&up_source_language=en&w=160&h=60&title=&border=&output=js"></script>
4. You can copy this code from this link.
5. Now you can see new blog gadget.
Available link for download
Friday, January 20, 2017
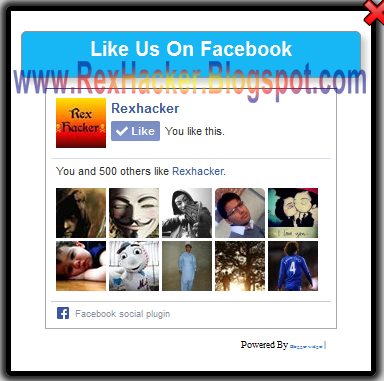
How to Add Cool Jquery Popup Facebook Like Box To Blogger
How to Add Cool Jquery Popup Facebook Like Box To Blogger

A pretty good way to increase your website Traffic is to generate traffic using Social network, One of best option is Facebook, Insert / Add Facebook pop up like box or widget to your website, its a Jquery widget and these days very popular among blogger gadgets, in previous post i have share very cool and worthy sharing that is How to Disable Right Click On Blogger For Images.
I hope you will like my these nice sharing and i will always try my best to share best things with my friends.
Now Lets Start to Learn How to Add Cool Jquery Popup Facebook Like Box To Blogger.
1. Log in to Blogger Account.
2. Go to Dashboard > Layout
.3. Click Add Gadget And Select HTML/Javascript.
4. Paste Below Code.
<style>#simplemodal-overlay{background-color:#aaaaaa;cursor:wait;}/* Container */#simplemodal-container{height:360px;width:360px;background-color:#fff;border:5px solid #000000;/*border-radius*/-webkit-border-radius:5px;-moz-border-radius:5px;border-radius:5px;moz-box-shadow: 0 0 5px 5px #222;
-webkit-box-shadow: 0 0 5px 5px #222;
box-shadow: 0 0 5px 5px #222;}
#simplemodal-container a.modalCloseImg{background:url(https://blogger.googleusercontent.com/img/b/R29vZ2xl/AVvXsEiTGnprTxexyTzzTR9wH2Fq-L1xWnnXluhyCN1gxrLHRjt5VVaIU5ZlexiKpAguPnnr660_yCtHW9gLZzHRsO1kqTvW6rl5Y6h1vFLw7Lvdbpxq-ewUZONdR5IC8iXxRD1u1Pb2uAvgdtg/s1600/Close-2-icon.png) no-repeat;width:40px;height:60px;display:inline;z-index:3200;position:absolute;top:-15px;left:350px;cursor:pointer;}
#simplemodal-container a.modalCloseImg:hover{background:url(https://blogger.googleusercontent.com/img/b/R29vZ2xl/AVvXsEhWPgZw3urcP91_kCnCrEVeU2gg4leOA2HAisxaTAloGKK743JnK9Clfd4XgRfGJCiIQohnIjlHCYkMF-2IitezIyTI3XCW6THEBs8sCNCJFhgUABLs3B_HitGo-6Ct80Mkb1CS8XP6RIk/s1600/Close-2-icon+copy.png) no-repeat;width:40px;height:60px;display:inline;z-index:3200;position:absolute;top:-15px;left:350px;cursor:pointer;}
#simplemodal-container #basicModalContent{padding:8px;}#btfb{font:12px/1.2 Arial,Helvetica,san-serif;color:#666;}#btfb a,#btfb a:hover,#btfb a:visited{text-decoration:none;}
.btbox-title{background:#16b7f4;color:#fff;font-size:20px !important;font-weight:bold;margin:10px 0;border:2px solid #ddd;border: 1px solid
#939191;/*border-radius*/-webkit-border-radius:6px;-moz-border-radius:6px;border-radius:6px;/*box-shadow*/-webkit-box-shadow:5px 5px 5px #CCCCCC;-moz-box-shadow:5px 5px 5px #CCCCCC;box-shadow:5px 5px 5px #CCCCCC;padding:10px;line-height:15px;font-family:arial !important;}
.btbox-tagline{color:#999;margin:0;text-align:center;}#btsubs-container{padding:35px 0 30px 0;position:relative;}a:link, a:visited{border:none;}.demo{display:none;}</style>
<script type="text/javascript" src="http://bloggertrixx.googlecode.com/files/jquery2.js"></script>
<script type="text/javascript" src="http://bloggertrixx.googlecode.com/files/jquery.btrix.js"></script>
<script type="text/javascript" src="http://bloggertrixx.googlecode.com/files/bloggertrix1.js"></script><div style=display:none>
<div id="fb-root"></div>
<script>(function(d, s, id) {
 var js, fjs = d.getElementsByTagName(s)[0];
 if (d.getElementById(id)) return;
 js = d.createElement(s); js.id = id;
 js.src = "//connect.facebook.net/en_US/all.js#xfbml=1";
 fjs.parentNode.insertBefore(js, fjs);
}(document, script, facebook-jssdk));</script>
<div id=exit_content style=padding:10px;> <h3 class="btbox-title">
 <center>Like Us On Facebook</center>
<p style="line-height:3px;margin-top:-10px;" ></p></h3>
<center><div class="fb-like-box"
data-href="https://www.facebook.com/RexHacker"
data-width="292" data-show-faces="true" data-stream="false" data-header="false"></div></center><p style=" float:right; margin-right:35px; font-size:9px;" >Powered By <a style=" font-size:5px; color:#3B78CD; text-decoration:none;" href="http://rexhacker.blogspot.com">Blogger widget</a> | </p></div></div>
Note: You Can Copy This Code From This Link.5. Change https://www.facebook.com/RexHacker With Your Page URL.
6. Save It And You Are Done.
Available link for download
Tuesday, January 17, 2017
Add Circle Image Style To Popular Post In Blogger
Add Circle Image Style To Popular Post In Blogger

i hope you will like this nice tutorial on Add Circle Image Popular Post Widget to Your Blogger.
Before i have share Awesome Multi Colored Popular Post Widget, i hope you will also like this post also.
Please must comment on this post and appreciate me for more nice tutorial and always love and like http://Rexhacker.blogspot.com
Now Lets start this Nice Tutorial.
1. Log in to blogger account and Go to Template >> Edit HTML
(make sure backup your template first)
2. Select Template coding with CTRL + A and click on Format Template
3. Find this code by using Ctrl+F ]]></b:skin>
4. Paste below code Before ]]></b:skin> code
5. Click On This Link And Get Code.
6. Again Now Find this code by using Ctrl+F
<b:widget id=PopularPosts1 locked=false title=Popular Posts type=PopularPosts>
7. After you found, scroll below until you see this code </b:widget>
8. Now delete it start to end.
9. After delete is place below code in same place.
10. Click On This Link And Get Code.
11. Now save your template. You are done.
Remember me in your prayers and must like my post and and also share with your friends.
You can visit my old Blogger Widgets and also can visit Premium Responsive Blogger Templates.
Available link for download
Subscribe to:
Posts (Atom)